I’m usually a get to the point kind of person. You know the type, no nonsense, please keep your answers to yes or no, I don’t have time for lengthy excuses, etc, etc, etc.
Well for all of you that are used to my ‘get to the point’ posts you’ll just have to scroll waaay down to get to the recipe. For those of you that want to get to know me a little better just read on 🙂
I have one huge red currant bush, it’s on the back corner of my back yard. So far I picked 8 pounds of berries off of it but only 4 pounds made it to the jam stage there’s a story to what happened to the other 4 pounds, I’ll tell it later.
I also had a smaller bush beside my property line. The farmer beside me seems to think everything is on his side of the border, and he will constantly plow over an extra few inches of land on my side every time he plows. So far he killed my second redcurrant bush and I have half of an elderberry tree left. I’m amazed that tree is still alive.
Well, I was really excited about picking the red currants. They glow like natures pearls. Just lifting a branch, the glow of the red berries hanging underneath against the dark green leaves is such a lovely sight.
It took me probably 40 minutes to pick 4 pounds. But why is it, that the last pound or so seems to take the longest to do?

I washed 4 pounds of red currents then put them in a pot and covered about 1/2 way up the berries with water. I boiled them for 30 minutes on a low boil to totally soften the berries. While they cooked I gently mashed them with a potato masher.
Now I’m about to tell you something very important. Use non-reactive pots and strainers. I thought my stainless steel strainer was just that, ‘stainless steel’. But it wasn’t, as my berries drained, in less than 20 minutes they started to go black where they touched the strainer. So of course I had to throw everything out. Boo Hoo 🙁
Well, I took a deep breath and headed outside and did it all over again. I was determined to make my jelly.

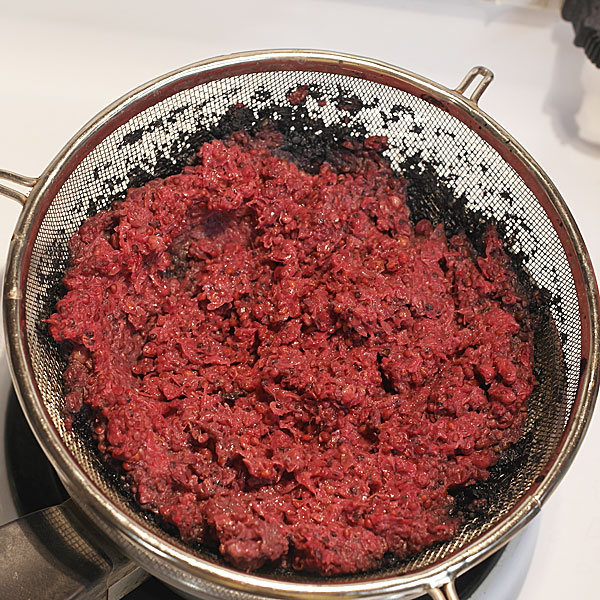
This time when it came to the straining stage I used a small holed plastic strainer. I was going to lay cheese cloth over the strainer, but the holes where small enough and I wanted to keep as much of the current as possible minus the seeds.
I was looking for body more so than clarity. I cringe at the thought of wasting so much of a beautiful fruit. I gently pushed the fruit through the plastic sieve. The richness of the color of these berries are amazing, I was really looking forward to the jelly.
My old recipe used equal amounts of sugar to liquid. After straining the berries I ended up with 5 cups of juice but I only used 4 cups of sugar. I prefer to be able to taste the fruit and not just sugar when eating jam. But don’t cut back too much of the sugar as it is needed to preserve the fruit.
I boiled the juice and sugar on medium high heat and stirred it in the beginning to dissolve the sugar. Then leave it alone for maybe 10 minutes.
Just check the bottom of the pot with a wooden spoon to make sure it isn’t burning on the bottom.
10 minutes should do it, but you can do the wrinkle test just to be sure.
Wrinkle test – Put a small bowl or plate in the freezer for a few minutes. Then dribble some red current juice on the plate and let it sit a couple minutes. Then push the juice with your finger and if it wrinkles its good and done.
*****
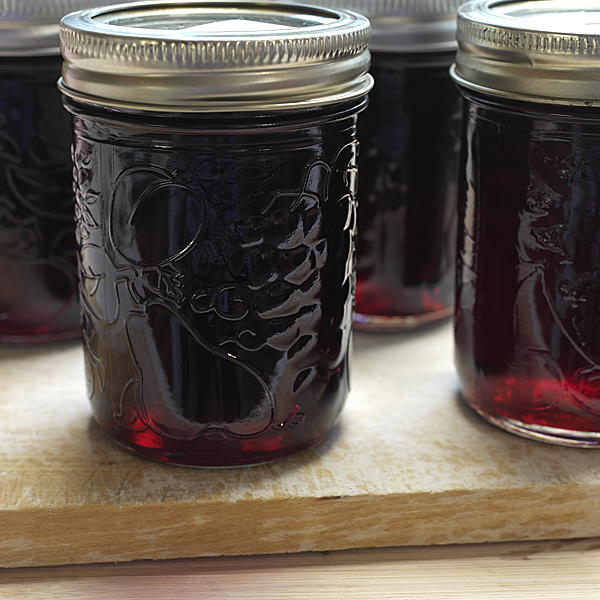
Pour into hot sterilized jars. When lid makes that pop sound you know its sealed. The pop sound happens anywhere from 8-10 minutes after sealing.
After about an hour I checked the jars and tilted one sideways and it still looked runny, but by the next day I opened one and it was perfectly jelled, all nice and wiggly.
Even though I reduced the sugar I still found it very sweet. I might do another batch with even less sugar than this batch.
Redcurrant Jelly Recipe:
Recipe:
5 cups strained red current juice
5 cups sugar (or less) I used 4 cups of sugar and still found it very sweet
2 cups water
Directions:
Wash berries, place in large pot with water, (enough water to cover the berries) simmer until the fruit is very soft about (60 minutes) mash gently with a potato masher during cooking.
Strain berries with a jelly bag, measure juice and add equal amount of sugar. Boil medium high, while constantly stirring to be sure that mixture doesn’t burn to the bottom, for 15-20 minutes until the jelly has reached the setting point, by doing the wrinkle test.
* Wrinkle test – Put a small bowl or plate in the freezer for a few minutes. Then dribble some red current juice on the plate and let it sit a couple minutes. Then push the juice with your finger and if it wrinkles its good and done.*
Pour the hot jelly into hot sterilized jars. Seal with the lids firmly by hand. But don’t tighten the ring so much that it can’t be removed later. When you hear the popping sounds it means the lids are sealing.
*Sterilize empty jars and the lids in the dishwasher or in a large pot of boiling water for 10 minutes.*
The above method of sealing jars has been used in my family as long as I can remember.
If using the jam in the next couple of weeks you can put the jam directly in the fridge.
For long term storage: The recommended methods require a water bath where you place closed jars submerged in a pot of water and boil for about 10 minutes to make sure jars are sealed. I like to follow these directions for preserving by water bath:https://www.bernardin.ca/en/stepbystep.htm
***************
Red Currant Jelly with apple chunks:
Add up to 5 chopped up apples and 1/2 lemon chopped up, to 6 cups of fresh red currants into the same pot. Cook fruit all together and mash together in pot when fruit is soft.
Strain and follow the recipe above. ( for every 5 apples use 1/2 cup less sugar)
* Adding apples provides a natural sweetener and pectin which doesn’t dilute the natural flavour of the fruit being used. Apples extend the recipe to add economy to the more expensive fruit.
Apples can be added to almost any fruit that is low in pectin, to help reach the jelly stage.


Fantastic! Sounds so easy, I will certainly try this without the pectin, much healthier and natural.